Backpackers.com — We highlight a lot of great content here at Backpackers. As we continue to grow our community, you'll start to see advice and articles from big and small backpacking bloggers — all of which help to increase the depth of knowledge about the wilderness.
The article below — 6 Tips for Trail Leaders — was sourced from the Hartley Brody Adventure Blog — a great (and fairly new) backpacking blog with helpful, straightforward advice from Hartley. Hartley is a computer programmer by day, and an excellently versed backpacker by night (and, well, during the day, too).
Below you'll find much of Hartley's original post, with some of our own commentary spliced in via italics.
6 Tips for Trail Leaders
Trail leaders are usually the ones who have the weather-proof map, are driving the car, and have been to the specific lake you're all about to find in the woods. Once everyone is loaded up they ask if you've got water, if you've got sunscreen, if your pack feels good. Then they saunter off onto the trail, beginning the wilderness adventure.
But a good trail leader will allow the group to switch who's leading the pack during the hike — and this is where Hartley's advice comes in handy. Partly, this is for those less-experienced backpackers that find themselves at the front of the hiking order. There are things you can do to take the lead with grace and leader-ly aplomb. It's also a great reminder for the individual who finds themselves steering the ship.

See Hartley's six tips for trail leaders below (our commentary in italics).
1. Keep an Eye Out for Trail Markers
Most trails in the US are marked with blazes or cairns to help hikers stay on the trail, as well as avoid trampling vegetation and getting lost.
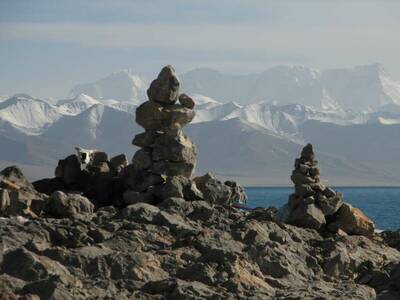
Blazes are usually colored shapes painted onto trees, or small reflectors nailed into the bark. Cairns are carefully places rock pyramids used to mark trails when there are no trees.
Every trail has a distinctive color or shape for its blazes – which is sometimes noted on a trail map of the area. A good hiking leader knows what trail markers to look for and keeps a mental note of when they saw the last one.
If the trail starts to get sketchy or it’s unclear where it leads next, the leader should stop and think back to when they saw the last trail marker.

If you can see another marker ahead, try to head straight towards it. It’s also possible you missed a turn and might need to head back to the last marker you saw to find the trail again.
Keeping track of the trail markers you pass may seem like a mundane task, but it’s one of the most important tasks the hiking leader has…Continue reading this step on the Adventure Blog.
One can take it to another level as a trail leader and consider adding to a cairn or blaze. Never do this if you're unsure of your trail, but if there is a cairn that the wind has pushed over, or a time-worn blaze, consider adding a few stones or taping some neon tape on the already-hammered in sign. This will help you remember when you saw the marker, and it will build a better trail for the future.
2. Stop at River Crossings and Trail Junctions
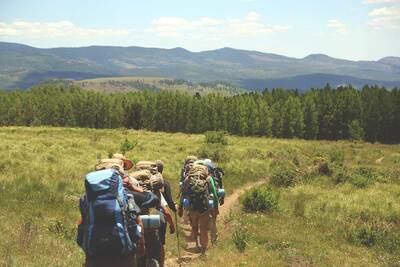
Any time the trail forks or presents multiple paths, it’s very important that you wait for everyone in your group to catch up before continuing on down the trail. The most common way that groups get split up and hikers end up lost is when they’re too spread out to see each other and end up taking different paths at the same junction.
If you find yourself with time to kill while you wait for the last members of your group to catch up, junctions and river crossings present a great opportunity to locate yourself on your map, since they’re usually well marked.
Confirm you’re on the right path, and see what’s up ahead so you can inform the group.
This is also a great, predetermined time for a break, if needed. Often hitting a fork in the road makes one feel like they've achieved one thing, and are beginning another. This can serve as a natural spot to rest, reflect on the hike so far, and gear up for what lies ahead.
3. Know What Challenges Lie Ahead
A good trail leader knows what lies ahead, and keeps the group well-informed so everyone knows what to expect. Does it get steeper? How far is it to the next water source? When will we reach the campsite or parking lot?
Even if you’ve never hiked this trail before, you can answer a lot of those questions by simply reading the map closely…Continue reading this step on the Adventure Blog.

4. Manage the Group's Pace
There’s a common saying among hikers that you should “hike your own hike” (HYOH). Part of that means setting a pace you are comfortable with and sticking with it.
But when you’re at the front of the group, it’s important to recognize how your pace impacts everyone else’s pace, and in turn, affects how they all feel about the hike.
If you’re going fast, some people will try to keep up with you, pushing their heart rate up higher than they’d like, which will wear them down more quickly. They’ll struggle more over steep terrain and need to take longer breaks to feel comfortable.

Other people will see you getting further ahead and get discouraged. As you start to disappear down the trail ahead of them, they’ll start to check out and their pace may slow even more as they feel left behind.
Alternatively, hiking too slowly can cause people to get jammed up behind you and frustrated. It also makes the hike take longer, which can have an impact on morale if you’re not making good progress towards your group’s goal…Continue reading this step on the Adventure Blog.
We will say this is a big one. Pacing determines so much of the trail. While splitting up can seem like an option when people have different priorities, we don't recommend it. Unless everyone is experienced with the terrain and backpacking, stick together and settle on the slowest person's upbeat pace. It's better (in the end) to get there later than exhaust a group member.
5. Set Everyone's Expectations When Taking Breaks
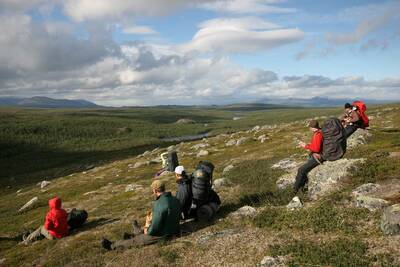
Inevitably, people will need to take a break to change layers, grab a snack or use the bathroom.
Whenever the group agrees to stop, it’s a great idea to quickly establish how long the break will be so that everyone is on the same page.
I usually try to establish whether the break will be:
- 2 Minutes – For grabbing a snack or water, or switching layers
- 5 Minutes – Bathroom breaks, checking the map, enjoying a quick view
- 30 Minutes – Making a meal, enjoying a summit, tending to first aid
If you don’t set expectations, people end up sitting around not knowing if they have time to take care of something, and then getting cold and anxious.

Someone assumes it’s a 2-minute break and leaves their pack on, but after a minute, someone else decides they need to run off to use the bathroom. After they’ve been gone for a few minutes, the first person decides to sit down, take their pack off and air their feet out, just as the bathroom person is coming back, and then someone else decides to start making a sandwich…Continue reading on the Adventure Blog.
The above is a hilarious and highly realistic situation that Hartley highlights. It will happen to you. Mind this concept, as you'll lose precious time in the awkward in-between.
6. Be Proactive About Keeping Everyone Comfortable
Every group – especially if it has newer hikers – runs into the same common issues:
- People start out chilly and put on too many layers, but after 15 minutes of hiking they're sweating profusely and haven't taken anything off.
- Warm and sweaty feet start to turn into hot spots which rub the skin until a painful blister ruins the trip.
- Even if they have a water bladder or bottle close at hand, people don't realize how much they sweat while hiking and get dehydrated.
As a trail leader, it’s good to periodically remind the group about certain issues and see if anyone wants to stop and address them.
On chilly days, after 15 minutes of hiking I’ll ask if anyone has started sweating in their jacket and wants to stop to drop a layer.
On warm days, I’ll ask people if their feet feel warm or sweaty, or if there are any problem spots forming.
By mid-day, I’ll make sure everyone had peed within the last 3-4 hours or ask how much water they’ve gone through, to see if they’re staying properly hydrated…Continue reading on the Adventure Blog.
Clearly Hartley is an excellent trail leader. We're lucky to have his wisdom. Check back for more from the Adventure Blog!
Images in order: Crossing the Outer Range by Paxson Woelber via Flickr; Screenshot of Hartley Brody Adventure Blog; Tibet Cairns by McKay Savage via Flickr; Hartley with his Map, courtesy Hartley Brody; Backpacking Group courtesy Unsplash via Pixabay; Day Trekkers Having break by Lauri Rantala via Flickr
