
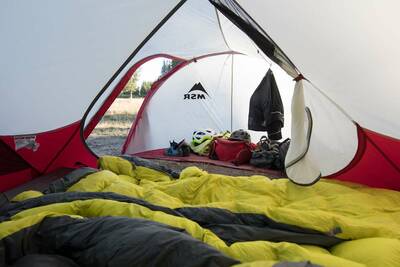
You’ve got the fancy tent, the ultralight sleeping bag that keeps you toasty all night, and the impossibly cushy sleeping pad that packs down to the size of a small burrito. Or you’ve got decades-old gear that has survived dozens of trips. In short: you’re stoked and ready to experience the great outdoors.
And you stay stoked, right until you put a hole in your gear. Unfortunately, puncturing your gear is just part of the game when it comes to camping. The woods are full of sharp things just waiting to tear into your gear. And, if you are trying to lighten your load, that lightweight gear is the more susceptible to ripping and tearing.
The good news is that a small hole doesn’t spell the end of any piece of gear. Most holes can be patched pretty easily with the right knowledge and equipment. We’ve put together this guide to help you repair holes in your camping gear, from clothing to tents to sleeping bags and pads.
Outdoor gear has a habit of ripping, no matter how careful you are. Learn how to repair your gear and extend its life!
How to Avoid Repairing Your Gear
The easiest hole to repair is the one you never make in the first place. Before we get into patching holes, here are a few tips to help you avoid making them in the first place. Holes in camping gear usually come from one of two places: sharp things poking your gear, or hot things melting it.
There’s not much you can do about sharp things poking your gear, other than be more careful. This means you shouldn’t run through a thicket of pokey branches, and you shouldn’t let your backpack fall from your back onto sharp granite. If you treat your gear gently, it won’t rip quite as much.
The much more common culprit is hot items burning a hole in lightweight nylon, which is what most outdoor gear is made of these days. And there’s a lot you can do to prevent that.
The first thing to be aware of is your campfire. Embers from your fire can get blown up into the air, float for a while, and land on you later, still burning. They extinguish themselves almost immediately, so you might not even notice them, but they’re hot enough to leave pinprick burns in the shell of your gear. So be aware of which way the wind is blowing.
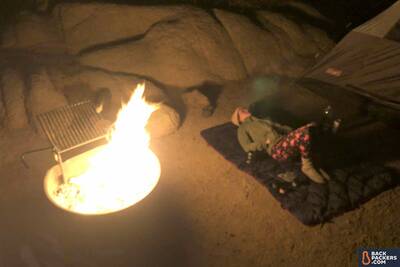
Careful of embers burning a hole in your gear.
Even if it’s just a very light breeze, you want to make sure you and your gear is upwind of the fire. Nothing ruins a brand new backpacking tent faster than a bunch of little ember holes in the fly.
Similarly, your camping kitchen can melt gear. Stoves and pans that inadvertently come in contact with gear can create huge holes very quickly. The best way to avoid this is to include a few potholders in your camping kitchen. That way you never have to worry about setting your pot on the floor of your tent, or melting your jacket on your stove.
How to Repair Holes in your Gear with Patch Kits
No matter how carefully you are, at some point, you’ll need to patch even the best sleeping pads and gear. Don’t worry, it’s quick and easy to do, and most patch jobs come out just as strong as when the gear was new.
For all outdoor gear, it’s a good idea to look at how the manufacturer recommends to repair it. For some products, like sleeping pads, many brands often supply patch kits. So before you do anything, look up your piece of gear and see if the original manufacturer has any tips.
Next, get yourself some patch kits. Gear Aid’s Tenacious Tape is by far the most popular option as a do-it-all patch kit that can can quickly fix holes in tents, clothing, sleeping bags, pads and more. Grab the small patches and throw them into your First Aid Kit so they’ll always be on hand.
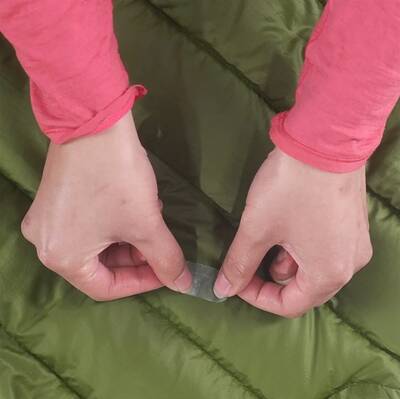
Gear Aid Tenacious Tape comes in different sizes and can be used to patch all sorts of holes in outdoor gear.
Here are our general guidelines for repairing holes in different types of gear.
How to Patch Tents
If you get a hole in the nylon material of your tent (not the mesh), you’ll first want to first clean the area (if you can) with a bit of soapy water, then let it dry. Next, coat the edges of the hole with a sealer like Silnet. This will bond the fibers together and keep them from fraying and making the hole bigger.
Then, once that has dried, you can use your patch kit to cover the hole. If the hole is in the rain fly of the tent, make sure the patch is waterproof. Tenacious Tape will be waterproof, but some other patch types won’t be.
The key to using any patch kit or repair tape is to cut a piece that’s a least one inch bigger in every dimension than the hole, and to make sure there are no pointy corners on the patch when you’ve laid it down. Pointed corners have a tendency not to stick, and to peel back over time, so you’ll want a patch shape with rounded edges, a circle or oval is best.
Again, make sure the area around the hole is very clean and dry before you patch it, as any dirt or moisture will make it harder for the patch to stick.
For tents (and backpacks) we recommend a patch both on the outside and the inside of hole. This will make the patch more durable, and less likely to let moisture in over time.
How to Repair Clothing and Sleeping Bags
In many ways, patching your clothing (like a rain jacket or down puffy) or a sleeping bag is just like patching a tent. It’s very important to repair up any holes as soon as you notice them, because if you don’t the down or synthetic insulation will escape, make a mess, and make the hole bigger.
Just like with your tent, you’ll want to clean the area first with some soapy water and let it dry. For down jackets and sleeping bags you’ll want to let it dry in the sun for a while. Then it’s a good idea to trim any loose strands around the edges of the hole, before you patch.
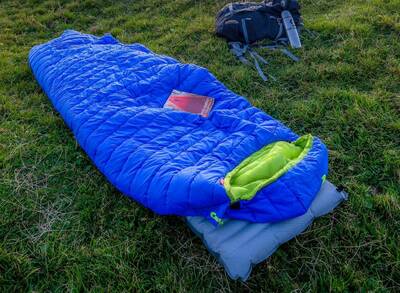
Sleeping outside is encouraged, but you’ll probably need to patch a few holes at some point.
Get out a patch that’s roughly one inch larger than the whole, and lay it down, careful to make sure your patch doesn’t overlap any baffles or seams. If it does, it will have trouble sticking. Smooth out the patch from the center to remove any air bubbles, and then use a sealer like Gear Aid’s Seam Grip to more firmly secure the patch in place.
With sleeping bags and clothing, you don’t have the option to patch from the inside as well, so make sure it’s really clean and dry before you stick the patch on. We recommend just spot-cleaning the area you need to patch, not throwing the whole bag in the washing machine, this can make the hole larger or pull out insulation.
How to Patch Sleeping Pads
Of all the camping gear you can put a hole in, sleeping pads might be the most frustrating (and the most common). A leaky sleeping pad leads to long, cold, hard nights out.
The first thing to do is to figure out where the hole is. If it’s not visible, inflate the pad all the way, and listen carefully to figure out the general area where the hole is. If this doesn’t work, make some soapy water and throw it on the pad where you think the whole might be — the air coming out will make the soapy water bubble. If you don’t see bubbles where the air is escaping, you’ll need to submerge it fully in the bath tub and find the leak that way — but it’s a last resort.
Once the hole is located, take note of where with a black marker and let it dry fully (while inflated).
Now for the patching: Most inflatable sleeping pads come with a patch kit, and it’s a good idea to bring it with you every time you use them. Deflate the pad completely, making sure you know where the hole is. Use an alcohol wipe to help fully clean the area, then let it dry again.
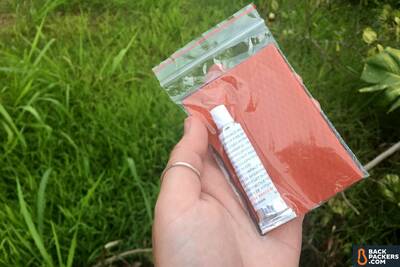
Sleeping pads almost always come with a patch kit, which is a tube of seam sealer and ripstop nylon fabric. Keep this inside the pad’s stuff sack.
Now, there are two parts in most sleeping pad patch kits: a tube of glue and a patch. Cut the patch to size, with no sharp corners. Coat the whole patch with glue, and also coat the area around the hole. Press the patch over the hole, and put a weight on it (like a book or full water bottle) to keep it down while the glue cures.
This is where patience really pays off. Make sure you wait however long the tube of glue says to. Let it cure all the way. Once it’s cured, inflate the pad carefully, and check the patch with some water to make sure it’s fully sealed and not bubbling at all.
If it’s not, prepare to sleep the night, and check the next morning to see if you lost any air.
In the end, repairing your outdoor gear is pretty simple. You just need a patch kit, a bit of time, and a positive attitude.
This post is Sponsored by evo
All images courtesy evo, All Rights Reserved
Backpackers.com Affiliate Policy: This guide contains affiliate links, which help fund our website. When you click on the links to purchase the gear we get a commission, and this goes a long way to creating guides, gear reviews, and other excellent content.
My tent has a cut in it, and I’m not sure what to do about it. It makes sense that I would want to get a professional to repair it for me. They would be able to ensure that it ends up working properly.
Fix it like a pro! Your blog on repairing holes in camping gear is a lifesaver for outdoor enthusiasts. Practical tips for a seamless fix. Thanks for the valuable advice!