
Backpackers.com — The question of food in wilderness is one often talked about and pondered by hikers, campers, and backpackers. For beginners, especially backpacking beginners, it's not always clear what the very basic principles are when it comes to types of food, storage, and preparation in the wilderness.
We have a guest post on this subject, which should serve as a primer for the uninitiated. Lee Flynn, a freelance writer who trains and teaches others on home preparation, healthy living, food storage techniques, and self reliance, is the author.
Backpacking Food Primer
If you're thinking about heading into the backcountry for an overnight backpacking trip, you might be wondering which foods to pack and how to best store them. Here's an introduction to food storage ideas that will help you mentally prepare for the trip, and make sure you stay full and healthy during your adventure in the wilderness.
Types of Food to Pack and Store
You'll need to pack nutritious, high-calorie foods to give you the energy you need for backpacking and hiking in the wilderness. It's ideal if those foods are lightweight and easy to carry, because you'll be hauling them for a couple miles at the least. There are four major categories of food to consider.
1. Freeze-Dried Foods
Freeze-dried foods are popular for overnight backpacking trips, even a single night, because they store well and are super light. They pack down easy, too, which is one of the main concerns with backpacking food. They are also the most “engineered” of all the types of backpacking food — individuals don't often freeze-dry their own food. They come prepackaged, and can be bought from a variety of wilderness retail stores. The benefit of this is that there is almost no work involved in freeze-dried food. In most cases, you simply have to boil water (sometimes just add cold water) and wait ten minutes while the food rehydrates.
There are many options available when it comes to types of food and types of meals. Snacks and desserts are both an option, but the most common freeze-dried packs are full meals for either one or two people. Here are some top brands for freeze-dried food:
- Mountain House
- AlpineAire
- Backpacker's Pantry
- MaryJanesFarm
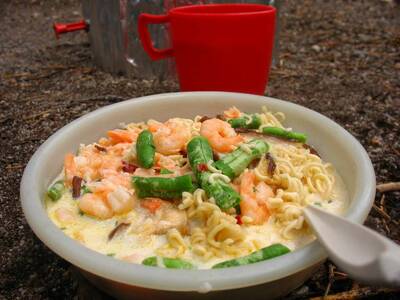
All of these are respected and have a huge assortment of meals. It all depends on taste, but we're fans of Beef Stroganoff with Noodles (a classic), the Vegetarian Burrito Bowl (solid and healthy), and Pad Thai Veggie (for the experimental). There are also a number of breakfast options available.
The best part? You can usually just pour your hot water right in the package, let it sit, eat it out of the package, and burn it after eating. No mess.
2. Energy Bars
Energy bars are pretty much a necessity on backpacking trips. It's common to store a bar or two in a hip-belt pocket for easy access during the hike because you'll be burning calories and won't want to stop and take out food. They are also fairly lightweight, and depending on the ingredients, very healthy.
You can buy energy bars, just like prepared freeze-dried foods. There's a huge industry for energy bars, with CliffBar and Kind being the most well-known. Countless other companies make equally good bars, some with very strange ingredients.
You can also make your own energy bars pretty easily. Just combine some of these ingredients (or all of them): dates, figs, raisins, nuts, dried fruits, sunflower seeds, dried coconut flakes, oats, peanut butter, and chocolate chips.
Dates are one of the most popular base ingredients for energy bars since they have an appealing taste, are highly nutritious, and can act as a binder to hold many other ingredients together. When making your own energy bars select the ingredients you want and make sure you have a binding agent, like peanut butter or dates. This will allow the other ingredients to stick together. Create a bar-like form with your ingredients and throw them in the freezer the night before your backpacking trip.
You can wrap your energy bars in plastic wrap or store them in sandwich bags for easy access on the trail.
3. Trail Mix
Trail mix is kind of the original energy bar, just broken down into a looser form factor. You can certainly buy trail mix, but it's often expensive and overly sweet. Just like those energy bars, you can make your own trail mix. You can use a lot of the same ingredients, too. Remember to include a lot of nuts for protein and fruit for natural sugar energy.
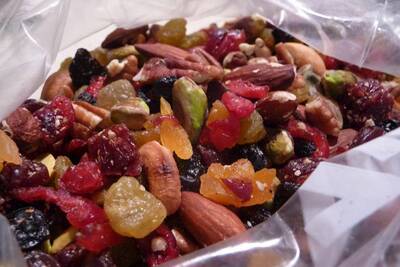
Trail mix is easy to store in Ziploc bags, and can be shared with a whole group.
Trail mixes and energy bars also work well for emergency situations; when you go to the trouble of preparing these, it's a good idea to make extra to have on hand for emergencies.
4. Prepared Meals
Prepared meals are the most labor intensive of all these methods, but are perfect for those who love to cook or want more control of the ingredients consumed on a backpacking trip. Also, prepared meals tend to be tastier. This involves pre-cooking certain ingredients for a meal, like grilling up veggies or cooking meat beforehand. This option will likely be heavier (unless you're using a dehydrator), but pack a real punch in flavor.
If you do go this route, make sure to bring something to store the food properly so that the meals are fresh and free of unwanted moisture.
How to Protect Your Food in the Backcountry
Once you've decided on the type of food, you will need to store and protect it properly. There are always critters in the wilderness. Raccoons are common in car camping areas, chipmunks and squirrels will almost certainly find you on a backpacking trip, and then there are bears.
Bears can be a real threat to your safety, but more often than not they're a threat to your food. The first step in protecting against this is knowing if there will be bears in the area you're backpacking. Check with the National Park Service, local State Park areas, and talk to a ranger before getting on the trail.
For car campers, do not make the mistake of thinking that your food will be safe if you lock it up and leave it in your car trunk. Bears are smart. They have been able to defeat various types of locking mechanisms on cars. Hungry bears have also been known to break into vehicles through the glass windows, rip apart the back seats, and then access the car trunks to get at the food stored in them. Bears do many thousands of dollars worth of damage when breaking into cars every year. In one single year in Yosemite National park, bears caused about $660,000 worth of property damage.
Most of the time decent car camp sites will have a bear box, which has a specific locking mechanism bears cannot open. Use this for everything that a bear could smell and think is food. This includes tooth paste, deodorant, other toiletries, and all your food.
For backpackers, there will not likely be any bear boxes. Instead, there are several food storage techniques backpackers use for to protect their food from bears.
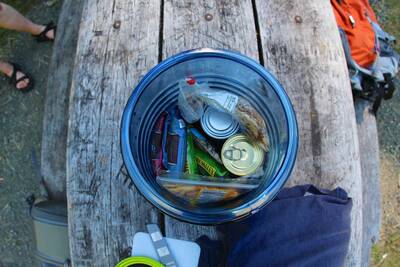
Bear Canisters: Bulky PVC bear canisters are mandatory in some popular recreational areas. Their disadvantages: they are heavy, and you may need more than one to hold all your food. If an area requires it, bring it. You could get a fine for not having one, and it could save your life. When using a canister, put all of your food-like items inside before bed and stash it somewhere dry and safe about 200 feet away from your camp.
Bear Bags: Bags are the other option when hiding food from bears or other critters. If bears are not in your area, you can use a variety of cotton, fleece, or synthetic bags to store your food. The issue with these materials is that if a critter does find your bag, it might chew through the material to get to your food. And nothing really blocks the smell of food. If bears are in the area but a canister is not required, consider getting the Ursack. It uses kevlar for its fabric, which is highly durable and blocks all odors.
When using a bag you'll need to hang your food, which can be time consuming. It entails literally throwing a piece of rope with a rock attached to end over a tall branch or sheer rock face an animal won't be able to reach. And, after all that, it won't always work. Still, for many backpackers in many locations, hanging food is a relatively simple option. Just make sure you have 25-50 feet of paracord and knot tying skills.
These are just a few food and storage ideas and that will help you maximize the time you spend out in the backcountry. Be safe and prepared out there.
Images in order: Dinner by fractalv via Flickr; My favorite trail mix by Rex Roof via Flickr; Bear Canister by daveynin via Flickr
