Eating in the wilderness is paramount to survival, but it's also one of the traditions that keep people from spending long nights in the woods. Most think the food just isn't that good. Homemade backpacking meals tend to change that sentiment.
There are two truths:
- After hiking 8-plus miles, everything tastes good. But not everything will make you feel good after eating — heavy gut, heavy hike.
- You can prepare homemade backpacking meals to get the exact meal you want.
The guide below comes from Thomas Freeman, a computer science engineer with a penchant for the wilderness. It discusses homemade backpacking meals and how to prepare them — below you'll find his process, reflections, and recipes.
Eating in the Wild: Why You Should Make Your Own Backpacking Food
When it comes to backpacking, preparing and eating meals can be a bit of a task. While car camping has the conveniences of ice-filled coolers, plates, silverware, and propane grills, backpacking does not have these luxuries.
Eating in the wild includes its own set of requirements, such as food storage without refrigeration, having as little trash and clean-up as possible, and preparation without a full stovetop. The most common option is to bring prepackaged freeze-dried foods for your meals. There are a number of companies that produce such meals, and you can find them online or in stores like REI.
While these are very easy to use and handy to have around, there are a few issues with them:
- A large amount of trash after eating. Typically a big pouch takes up room and is made of heavy-duty materials. (Always remember to Leave No Trace!)
- You are limited to their selection of meals.
- The extremely sharp edges of the plastic can actually damage the backpacks they are stored in.
In March of 2016, I was fortunate enough to be offered an internship working with a name-brand tech company on the West coast. Since I live in Florida, the plan quickly became to drive across the U.S., with its endless opportunities for incredible backpacking through some of the country’s most amazing National Parks and forests. In preparing for this trip one of the main concerns besides picking trails and getting permits was the preparation of food.
While I had originally thought that I would just buy a bulk order of pre-packaged freeze-dried meals, the reasons above encouraged me to find an alternative. Enter homemade backpacking meals.
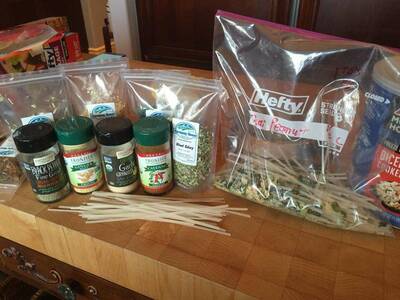
Creating these DIY backpacking meals has a number of advantages:
- Different Flavors: There are endless amounts of meal combinations one can come up with, which means a more tasty and varied eating experience.
- Packaging: While I use Hefty brand ziplock bags, these could be stored in whatever you can fit in your pack.
- Customization: Gluten-free? No Problem! Like it salty? Go for it! Make these meals how you want them.
How to Prepare DIY Backpacking Meals
Making DIY backpacking meals is easier than it might seem. I break it down into four main parts below, then run a cost analysis of every part. Here's the shortlist of what you'll need for any DIY Backpacking Meal:
- Base
- Vegetables
- Protein (meat, dairy, soy, etc.)
- Fat and Calories
- Spices
The Base in Homemade Backpacking Meals
Any kind of starchy food can work here. The only requirements are that they cook fast and don’t poke holes through your packaging! (More on this later).
I decided on three different base informal meals — linguine, Thai rice noodles, and white rice.
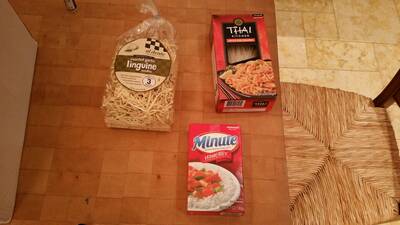
All of these were relatively cheap as I ended up buying in bulk on Amazon for less than $1 per serving!
A full list of good bases for DIY backpacking meals include:
- Rice: quick-cook white or brown rice, though white cooks faster most of the time.
- Noodles: Rice noodles, soba noodles, even ramen-style noodles will work. If they are made with eggs even better (a bump in protein).
- Pasta: Linguine, spaghetti, campanelle, macaroni, the list goes on. Pick your favorite form of pasta and bring it. (Pro Tip: Don't pick angel hair. It's messy and will clump out there.)
- Couscous: You can get couscous that just requires water and time to soak and “cook”.
- Potato flakes: This is a staple for many people, and while they're not the healthiest, they do starch up a meal like no other.
The Vegetables in Homemade Backpacking Meals
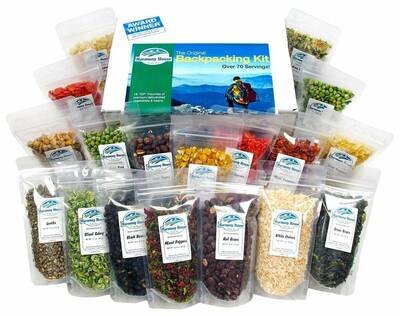
Of all the ingredients in this list, I was most excited to customize my meals with freeze-dried vegetables. I found a company called Harmony House, which creates packaged freeze-dried vegetables for backpackers and campers. Harmony House makes kits that include a variety of vegetables and beans.
While I used them solely for backpacking, I can see how these would be very useful for an office snack, or to spice up a simple meal in the dorm room.
While I was really excited and pleased to use the freeze-dried veggies, to save even more money in the long run I would recommend buying a dehydrator and using fresh veggies in bulk. If you backpack often, the dehydrator should pay itself off in no time, as the freeze-dried alternatives aren't that cheap. The kit from Harmony House is $50.
Another slight downside with freeze-dried veggies is they don't contain the same levels of ascorbic acid and polyphenols, which help to protect cells, as their normal veggie counterparts.
If you choose to use fresh veggies, get some that last a while (like bell peppers and carrots), or plan to eat them on the first couple nights, leaving them dehydrated and freeze-dried for later on.
If you want to dehydrate vegetables for your DIY backpacking meals, here are some good ones to start with:
- Carrots
- Bellpepper
- Broccoli
- Spinach
- Sweet potatoes
- Tomatoes
- Kale
- Green Beans
- Mushrooms
The Protein in Homemade Backpacking Meals
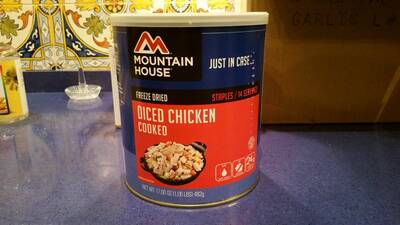
While there are a variety of companies that make different freeze-dried and dehydrated meats for backpacking, I decided to go with Mountain House's large can of diced chicken. My hiker in crime (read, girlfriend) is not a fan of beef and I cannot stand tuna for the life of me, so chicken was our only easy choice.
If I were to hike alone or go with a different group I would be interested in trying some recipes that called for beef or something even more exotic.
Each recipe I used called for around 1/2 cup of chicken, which made for very easy meal prep.
If you don't eat meat, getting protein in your meal is still important. You need protein to fuel your hiking (though carbs and fat are probably more important, as I detail below). Consider black beans that have been soaked or pre-cooked, tofu that's pre-cooked, or a fresh add-in ingredient like avocado, which you can put on top of your meal.
Some of these also come in dehydrated or freeze-dried forms, if you want to buy them. For instance, that Harmony House package comes with black beans, northern beans, lentils, red beans, and pinto beans. Beans are the thing!
Fats in Homemade Backpacking Meals
There are constant updates to the nutritional importance of fat in your diet, but for backpacking, it's a unique situation (as opposed to weight loss). During a trip, you burn way more calories than normal, and any thru-hiker will tell you that they crave sheer calories over everything, day after day.
In fact, one issue with freeze-dried meals that are made by companies is they don't really offer enough calories to totally satisfy long-distance hikers.
So, you'll want to add plenty of fat and make sure you are getting calories to burn in these meals. You can store most of these things in reusable plastic bottles with secure lids, or they come in small packages.
Every food item here has calories, but fats have the highest number of calories per gram, so if you increase fats you'll increase overall calorie consumption.
Fat can come from these items:
- Olive oil
- Coconut oil
- Butter
- Powdered cheese
- Powdered butter
Spices in Homemade Backpacking Meals
While rice and chicken are not so bad by themselves, adding a variety of spices really changes things. From cumin seed and pine nuts to cinnamon and ginger root, the list can go on and on. This is where the customization of homemade backpacking meals really shines, and it is here where you have the power to make the meals the way you want.
I was lucky enough to be able to use some of my parent's spices while I was home prepping for the upcoming trip.
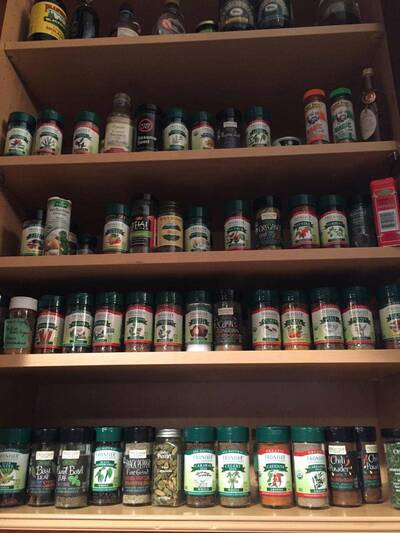
If you don't have access to a huge spice cabinet, consider buying some of your own and spicing up your normal cooking routine! A house with paprika, cumin, chili powder, and turmeric can cook all sorts of delicious meals.
That said, you can buy seasoning mixes, from small local markets to larger grocer stores. These will contain a range of spaces and typically come in larger flavors, like “Mexican spice” or “dahl”.
Finally, you can buy some curry paste and stick it right in your meals, creating some deliciousness on the trail. (Watch how much you put in though, it can get spicy!)
Put the DIY Backpacking Meal Together
After securing the base, the protein, vegetables, fats, and spices, you're pretty much ready to go to combine everything.
If it's all freeze-dried, dehydrated, or stores fine in a bag, weigh out everything into individual meals. Get creative. Make different flavored meals for different nights, use certain vegetables in certain dishes, and change up the protein if you can.
The fat will probably all be added after you cook, so store that elsewhere.
Once everything is divvied up you can just store them in bags — I used ziplock freezer bags, but something reusable like a Stasher is excellent, too. Number them with a sharpie, and you're all set!
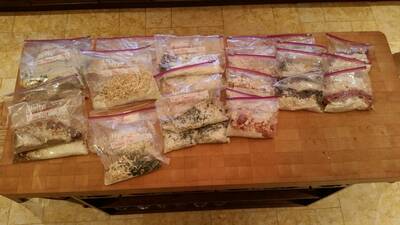
Making your homemade backpacking meals should be as simple as:
- Boil water.
- Add boiled water to bag to bag (or add contents of bag to water, depending on your setup).
- Wait 5-10 minutes.
- Add fat.
- Enjoy!
If any of your ingredients aren't already prepared, like fresh avocado, dice them up while waiting for your meals to soak up water.
Homemade Backpacking Meals Price Breakdown
Saving money was one of the original reasons why I decided to make my own backpacking meals. I did end up enjoy saving weight, having more resourceful packaging, and the sheer fun of making my own food, but in the end I was very interested to see how the price difference would turn out.
I posted my initial setup to Reddit, and user /u/cornered_crustacean completed a price breakdown, which can be seen below:
- $12.99 for rice (72 oz, 44 servings), $14.31 for noodles (6 x 14 oz, 42 servings), $17.35 for linguini (6 x 12 oz, 36 servings).
- $53 for the box of veggies, 70 servings
- $40 for the can of chicken (17 oz), 14 servings
- Spices? You probably have these, but $25 will get a starter set
So with my crappy rounding and estimating:
- Starch: $0.37 per serving
- Veggies: $0.75 per serving
- Chicken: $1.14 per serving
- Spices: $0.35 per serving (scaled to 70 servings)
Homemade backpacking meals came out to a total of $2.61 per serving.
I then compared these costs against Mountain House meal costs to see just how much of a savings I got.
Mountain House meals typically come with 2.5 servings in a single packet for $9 (not on sale). This is true of the Mountain House Chicken Teriyaki with Rice, Mountain House Beef Stroganoff, and the Mountain House Spaghetti with Meat Sauce.
Mountain House also offers an extra-large Essential Bucket with a mix of its meals. This is $102.99 for 32 services, which equates to $3.21 per serving, so a little less.
So, there is roughly a dollar saving per meal, which isn't a huge amount, but for anyone on a budget that's not bad. The biggest part, though, was the flexibility of making my own food, the convenience of packaging it how I like, and the fun I had creating them all made it well worth it in the long run.
With the lessons learned from doing this for the first time, I am confident that I would be able to lower the price, even more, the next time I decide to make these meals.
Tips and Tricks for Improving Homemade Backpacking Meals
As I mentioned earlier, these meals were created for a trip across the U.S.
Seven National Parks and many homemade backpacking meals later, I can say that this was a success.!I had very few issues and most of the meals cooked well and tasted amazing!
While I am not sure if hiking for 10 miles through mountainous terrain makes everything taste better (let's be honest, it does), I can confidently say that I will be using this method from now on whenever I go backpacking.
While the meals mostly turned out great there were still some issues that came up.
1. Always assume the base requires more time than it claims.
The Asian rice noodles I used for many of my meals took way longer than I thought they would to cook. I believe it was partially due to the altitude I was at (over 9,000 feet), but even after 20 minutes of cooking in the bag, and with the meal becoming less warm by the minute, I succumbed to eating hard noodles.
Luckily this did not happen with the rice or pasta noodles.
2. Add way more salt
While I originally thought the combination of spices would make the flavoring sufficient, I found it a common theme that the meals tasted as if they could be significantly improved with another teaspoon or so of salt.
Along with being a crucial ingredient in remaining hydrated, the extra sodium would have been a welcome addition from a taste-profile perspective.
3. Less Pokey, More Round-y
I made the mistake of ordering thin, sharp noodles to use as the base for some of my meals. Along with some of them being hard and unable to cook thoroughly, they also had the property of being incredibly sharp.
I discovered this when I went to pour boiling water into the bag and some of it seeped through holes, giving me a delightful surprise on my thighs. A lesson here would be to buy less sharp noodles; luckily I had no issue with the pasta noodles nor the rice.
3. Your Eyes Are Bigger Than Your Stomach
Seriously. For almost every single meal we had lots of leftovers. Even after hiking for 8+ hours a day and having nothing but snacks throughout the hike, we were never able to properly finish a meal.
I'm 6’3” and can put away a double bacon cheeseburger like nothing, but that big bag of fiesta chicken proved too much for me to handle.
Home Backpacking Meal Recipes
All and all I think this was an incredible learning opportunity that turned out excellent. Being that this was my first time making these homemade backpacking meals I still think it was a resounding success
As much as I would like to think I made this all up myself, I stand on the shoulders of giants.
I found a lot of ideas and inspiration from a number of websites, including The Yummy Life, Wild Backpacker, and Trail Recipes.
Below I've listed a few of the recipes I used. Note that these are single-serving recipes meant for a hot meal after a long day of hiking. Adjust ingredients as necessary.
Basic DIY Backpacking Meal Instructions:
- Combine all dry ingredients into a ziplock or similar plastic bag.
- When on the trail simply boil the appropriate amount of water and add to bag.
- Stir thoroughly and let sit for 5 to 10 minutes, then enjoy.
Alternatively, you can add the contents of the meal to your stove and boiling water if that works better for your setup.
Fiesta Chicken Recipe
- 2/3 cup instant brown rice
- 1 teaspoon chia seeds or ground flaxseed (optional)
- 1/3 cup freeze-dried chopped chicken
- 1/2 cup freeze-dried corn
- ¼ cup freeze-dried chopped tomatoes
- 1/4 teaspoon dried minced jalapeno
- 1 tablespoon freeze-dried onions (or 1 teaspoon dried onion flakes)
- 1-1/2 teaspoons powdered chicken flavor base (or bouillon granules)
- 1-1/2 teaspoons chili powder
- ¼ teaspoon cumin
- 1/4 teaspoon dried oregano (Mexican preferred)
- 1/2 teaspoon freeze-dried cilantro (or 1/8 teaspoon dried)
- ¼ teaspoon garlic powder
- 1/8 teaspoon ground black pepper
- ¼ teaspoon salt (or more to taste)
- 1-1/2 cups water
Creamy Chicken Alfredo
- 1 cup pasta broken in 2” pieces (use pasta that normally cooks on stovetop in 4 min. or less—thin egg noodles, angel hair pasta, or quick-cooking artisan pasta)
- 1 teaspoon chia seeds or ground flaxseed (optional)
- ¼ cup freeze-dried chopped chicken
- ¼ cup toasted pine nuts
- ¼ cup freeze-dried chopped mushrooms
- 1-1/2 teaspoons powdered chicken flavor base (or bouillon granules)
- 3 tablespoons grated Parmesan cheese (the dried, unrefrigerated kind in a can)
- 2 tablespoons instant dried buttermilk powder (or regular powdered milk)
- 2 tablespoons corn starch
- 2 teaspoons freeze-dried Italian herb blend (or 3/4 teaspoon dried Italian herb blend)
- ¼ teaspoon garlic powder
- 1/8 teaspoon ground black pepper
- ¼ teaspoon salt (or more to taste)
- 1-1/4 cups water
Thai Peanut Noodles
- 1 cup pasta broken in 2” pieces (use pasta that normally cooks on stovetop in 4 min. or less—thin egg noodles, angel hair pasta, or quick-cooking artisan pasta)
- 1 teaspoon chia seeds or ground flaxseed (optional)
- ¼ cup freeze-dried chopped chicken
- ¼ cup chopped roasted peanuts
- ¼ cup freeze-dried mixed vegetables
- 1-1/2 teaspoons powdered chicken flavor base (or bouillon granules)
- 2 tablespoons PB2 powdered peanut butter
- 1-1/2 teaspoons freeze-dried cilantro (or ½ teaspoon dried cilantro)
- ¼ teaspoon garlic powder
- ¼ teaspoon ground ginger
- pinch of ground cayenne pepper (or more if you want it spicier)
- 1/8 teaspoon ground black pepper
- 1/4 teaspoon salt (or more to taste)
- 1 cup water
For more backpacking meal ideas, tips, lessons, and inspiration check out Chef Corso's trail recipes.
All images courtesy of Thomas Freeman, All Rights Reserved
Backpackers.com Affiliate Policy: This guide contains affiliate links, which help fund our website. When you click on the links to purchase the gear we get a commission, and this goes a long way to creating guides, gear reviews, and other excellent content.
Hi, I was looking at the recipes, they do sound good! Is the fiesta chicken the amount that you brought with you that was too much? It doesn’t sound like it’s quite 2 servings, more like 1 1/2. I’m more than willing to share, I don’t personally eat a double bacon cheeseburger, but don’t want to pack less than needed.
Hi Lynn,
Thanks for reading and commenting! Not sure if Thomas will come back to you quickly (he wrote this a long time ago), but I wanted to chime in. Overall, yes, the recipes listed here ended up producing more food than necessary, so you could look to cut the overall amount. THe best way to do this would be to just make the recipe at home and see how much you have left over after a meal. Know that you’ll be hungrier on the trail (and probably eat more), but it will give you a good idea.
You can also compare overall nutrition of a homemade meal to a pre-prepped meal (like Mountain House, Good-to-Go, or Backpacker’s Pantry) to see how much they recommend for X number of people.
Good luck!
Nice article…good sleuthing. Well done!
It’s June 2021 now, and political climates are driving newbies like myself to consider some serious prepping. There are tons of videos on YouTube that include lots of…sobering…albeit realistic suggestions/information about food prep and other subjects.
I’ve tried the Mountain House meals; the two-serving pouches are closer to $10-$11 now, and between hubby and myself, we found we needed to supplement with crackers and a small salad, so the pouch meals are a bit light. But they were excellent. Because I cook, I’m working on exactly this subject: combining meals myself and hope to save money than buying pouches. The issue seems to be that the ingredients reconstitute at different times, so your suggestions about rice & pasta are helpful. I also need to investigate cook times between diy dehydrated veggies vs. bought freeze dried. If they are close or spot on, it’s reasonable to consider a home dehydrating kit and really make what we like to eat…buying in season, clearing frozen bags from the freezer, etc.
This was really helpful! Thank you!
Hi, this is great; my husband and I backpack and we’re tired of pre-bought, expensive freeze dried meals that are carb loaded and so many people have websites using a dehydrator, which I don’t have … putting freeze dried ingredients together seems like a good way to go.
How did you figure out how long to soak the food?
Thank you
Hey Jen.
I’ve rehydrated more meals while backpacking than I can count. The timing does depend a bit on what you’re rehydrating (thick cuts of meat and thick noodles will take longer than rice or potatoes, for instance).
However, generally speaking, if you use hot water to rehydrate it will take several seconds to a few minutes to rehydrate just about any food.
When cold-soaking, this can take anywhere from 15 minutes to 45 minutes, roughly. While backpacking I usually start cold-soaking food about 30 minutes before I plan to sit down for lunch or dinner.
Hope that helps!
I’m wondering- does the ziplock back hold up to the heat of the boiling hot water? That’s the only part I’m a little scared of trying out, and I’m wondering if there’s some thicker kind of bag I could use? I’m debating finding a camp mug w/ a sealing lid, and making one of those cup cozies. Let me know if you use the ziplock! thanks