There’s nothing like an ice-cold mouthful of water after a hot, hard hike in the backcountry. I often equate it to peeing under the Milky Way — basically an essential backpacking experience. That water rarely comes straight from the source, though. It’s been filtered or purified so that, hours after quenching my thirst with nature, I don’t feel the first tendrils of some waterborne pathogen.
Nobody wants giardia on a good day. You especially don’t want it (or anything else lurking in a stream or river) miles from civilization. So you pump, you squeeze, you mix in drops or tablets and shake vigorously, you let ultraviolet light destroy the viruses, and, when all else fails, you boil the hell out of that water before you drink it.
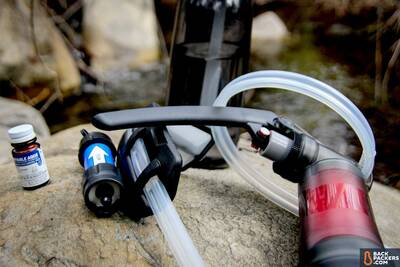
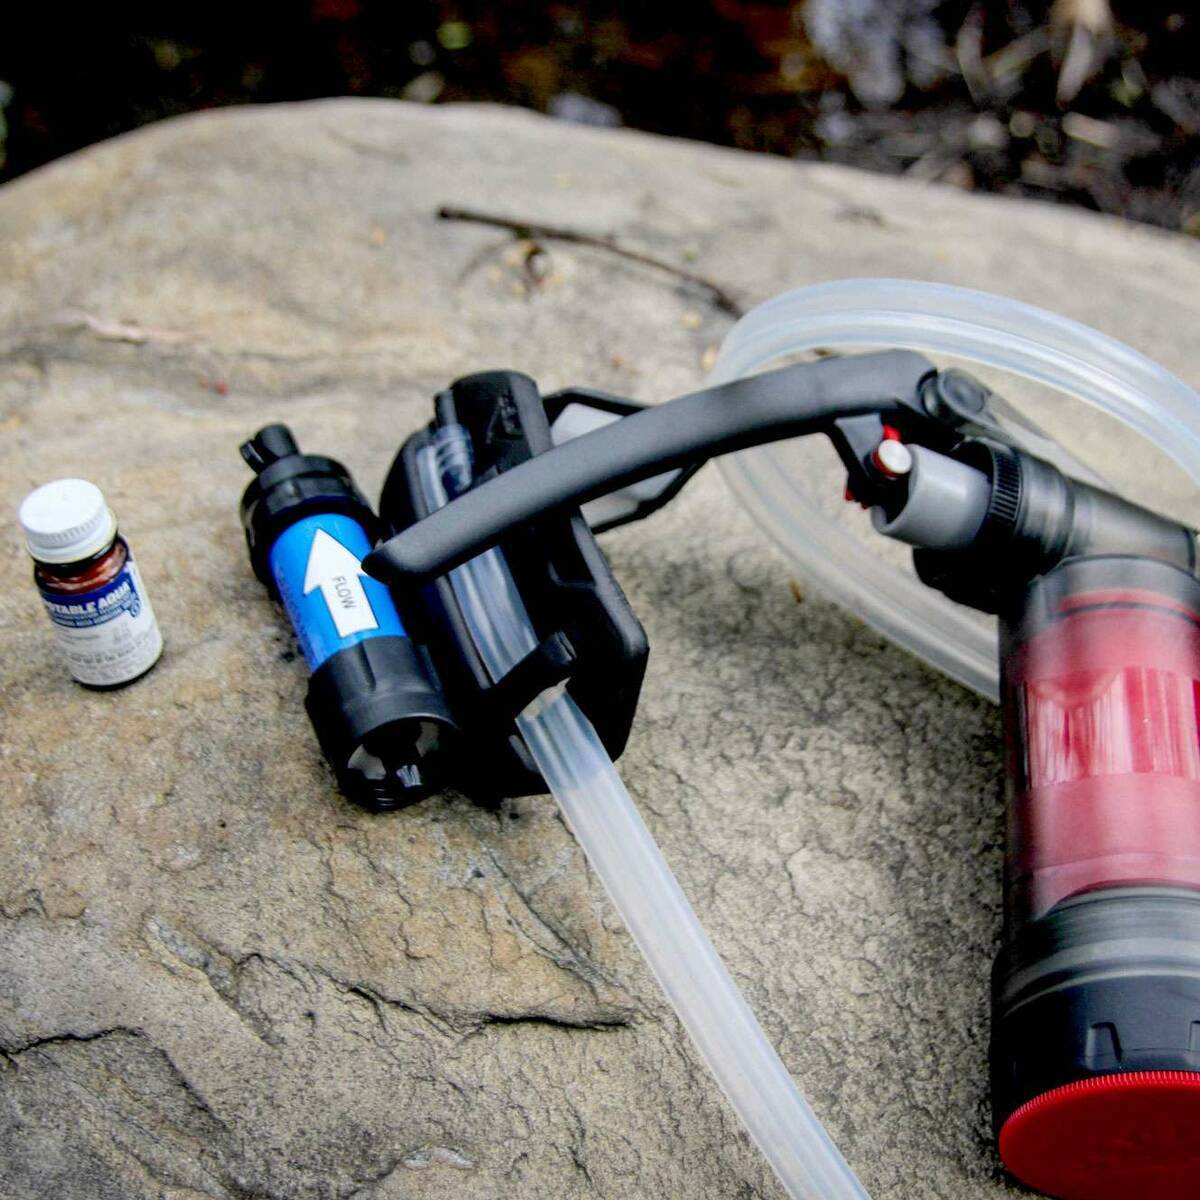
A few water filters and water purifiers waiting to clean water.
The unfortunate reality is that in much of the developed world you shouldn’t drink straight from the source. There are exceptions, but bodies of water in the U.S., even in the backcountry, should be filtered or purified prior to consumption.
This Outdoor Guide will explore why we treat water, the specific methods in which backpackers and travelers treat water, and what options are best for you. Scroll to a specific section with the Table of Contents below, or read the whole thing. (It’s for your own good, I promise.)
- Water Treatment
- Pathogens
- Filtration vs. Purification
- Treatment Systems
- Micron Size
- Extra Features
- Backpacker Types
Why Treat Water in the Backcountry
Gone are the days when you could come around bend in a trail, discover the rushing sound of water, bend down, and drink your fill. That time is romanticized in backpacking culture — a past when water was good no matter what, and you could live off the land without the need of modern instruments.
Actually, the idea is so romanticized that some people still do it, regardless scientific studies and Center for Disease Control fact sheets, all of which confirm that there are pathogens in the water you’re drinking. Different studies have come out debating this; TheTrek sums the bulk of these up very well, citing a number of sources, all of which are steadfast in their advice: treat your water!
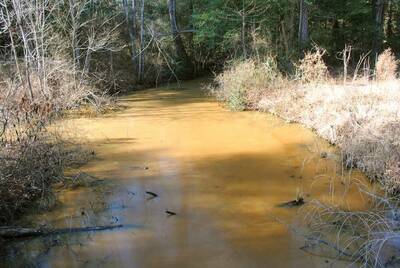
You definitely want to treat this water. Photo by Lee Canon via Flickr.
There are a few rare instances in high-alpine environments where it may not be necessary, but this won’t apply to most people. Even if you wanted to get to those pristine water sources you would have had to climb up there, and water filters or purifiers are standard recommended gear for extreme trips like that.
Livestock, wild animals, human traffic on trails, environmental decline, and a number of other reasons contribute to the degradation of water quality. So, what exactly are you avoiding?
What Are Pathogens In Backpacking Water Sources?
The word is pathogen scary, and you should be scared. Pathogens can mess you up, especially your digestive tract. Pathogens usually come from human and animal fecal waste. Animal waste is more common in the backcountry, but on highly-trafficked trails less experienced backpackers may leave their own waste too close to water sources. Untreated water in higher population cities and underdeveloped countries often have more human waste. (Gross, but true.)
The pathogens found in water sources are split into three groups:
Protozoa
Protozoa sounds epic, but it’s actually the most common problem you’ll face in untreated water. It comes in two forms: Giardia, which you’ve probably heard of, and Cryptosporidium, which you probably can’t pronounce. Both are parasitic organisms commonly found in streams, rivers, lakes, and ponds; and both cause gastrointestinal illness, like cramps, diarrhea, and vomiting.

Giardia has an artistic side, too! Courtesy the Center for Disease Control.
Giardia is easier to treat than cryptosporidium, but both protozoa can be eliminated by most filters, purifiers, and treatment systems.
Bacteria
Bacteria is gross, and pretty common in backcountry water. Common bacterias found in streams and lakes are Dysentery, E.coli, Salmonella, Shigella, and Campylobacter, all of which destroy your digestive track and give similar symptoms as protozoa.
Bacteria can also be eliminated by most filters, purifiers, and treatment systems.
Viruses
Protozoa and bacteria should be avoided, but viruses are on a whole different level. You still end up with intestinal problems, but you can also get hepatitis or meningitis if the water happens to contain it. You really don’t want those.
The good news is that viruses are much less common in U.S. water sources, especially in the backcountry. They aren’t found in high, provable levels in the streams and lakes you might drink from, so if that’s your primary destination you don’t have to worry too much.
However, you will have to protect against them when traveling internationally, especially in underdeveloped areas. The bad news is that most filters for the backcountry do not get rid of viruses, so you might need another unit if you travel abroad.
Is There a Difference Between Filtered and Purified Water?
The pathogens above are either removed from water, killed, or rendered ineffective by filtration or purification. Each method and the corresponding device has its upsides and downsides, and you’ll end up making a specific choice depending your specific needs (as it always goes with gear).
The first consideration is if you need the water to be filtered or purified, which begs the question: is there a difference between filtered and purified water? Yes. The two are not the same, and it’s critical to know the difference.
Water Filtration
Water filtration to remove pathogens is how any other filtration process works: you need a device that blocks the pathogens while simultaneously letting water through.
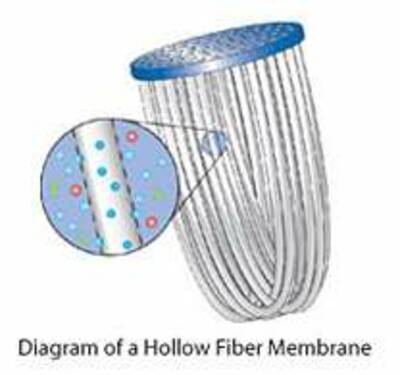
Image courtesy Sawyer, All Rights Reserved.
You can’t see pathogens with your naked eye, but they’re there — dangerous little blobs bobbing around, waiting to wreak havoc in your belly. Filtration systems are sized to effectively block these pathogens.
However, as I said above, the majority of the time filtration only works on protozoa and bacteria. These organisms are larger than viruses, and therefore easier to block with a filter.
Filtration is the most common route for U.S. backpackers because it’s what they’re commonly up against. The devices for filtering water are offered in a massive array, which I’ll detail below.
Water Purification
Purification takes it one step further. To be pure is to be free of contamination (or to have really good intentions) and water purity is important to international backpackers or those who want to be extra cautious.
Water purification takes care of the viruses, which are typically too small to be blocked by filtration. While purification can be done with filtration, it’s mostly done through chemical treatment or sterilization. When looking for something that tackles viruses, seek out the words “purifier,” not “filter.”
Backpacking Water Treatment Systems
To filter or purify is the easiest question to answer in the water treatment equation. How you will filter or purify is where the gear-junkie rears its obsessive head.
Water treatment is not a new concept. There are tried and true methods of purification from the 1970’s and earlier, but, as with all technology, advancements have been made in size, efficacy, and weight over the years. You can find a filter or purifier that fits your exact needs at a precise cost. You can filter for group or solo trips. You can burn off pathogens with magic wands or hunker down like an outdated safari-hunter and sip from the stream itself.
Backpacking water treatment systems abound; let’s dig into them.
Boiling Water
I’ll start with the most basic and boring of the bunch. Before there were giardia-filled waters there was the option to boil water. You have always been able to do it, and will always be able to.
The beauty of boiling water is that it works consistently and isn’t hard to remember. As the CDC says, keep your water at a “roiling boil” for a minute and you will kill off any protozoa, bacteria, or virus. It needs to boil for three minutes if you’re higher than 6,562 feet. Roiling boil means when there are solid plumes of bubbles rising from the base of your pot.
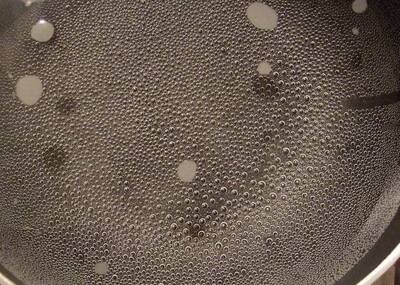
These bubbles must jet to the top for a “roiling” boil. Image by Indi Samarajiva via Flickr.
Boiling water is purification.
The Pros
- Simplicity: You probably already have a cook set, so you can probably boil water. This is especially true if you have an open fire.
- Survival: In a dire situation you can often find a way to start a fire and boil water, assuming you have some water to boil.
The Cons
- Need Fuel: If you can’t have an open fire it gets more complicated. You need fuel to boil water from a backpacker’s stove; fuel can be heavy and it can run out. Open fires aren’t always allowed in the wilderness (though this varies immensely across the U.S.), and sometimes wood is not readily found.
- Takes Time: For those who want to quickly filter water and be on their way, boiling water is a terrible choice. It takes a chunk of time to boil water, then a full minute of it boiling, and then the cooling period before you can drink.
Chemical Water Treatment
Chemical treatment has not been around as long as boiling water (since humans found fire), but it’s considered the old-school, tried-and-true method. This means dropping tablets or drops into a container of water, shaking it around, and waiting the appropriate amount of time until all the pathogens are dead. Yes, you’re drinking dead pathogens.
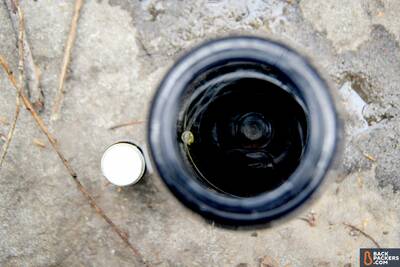
That yellow/green tab is iodine. It tastes gross and will discolor your water. It also will keep you from getting sick.
It’s important to note that chemical treatments, which I’ll list below, are something you should always carry as a backup. They have a decent shelf-life, work without any extra elements, and have no “pieces” that can malfunction.
Chemical treatment is purification.
Iodine
The old-school chemical treatment for backpackers is iodine.
Pros
- Availability: Iodine can be found in most outdoor stores and has an unopened shelf life of around 4 years.
- Weight: Iodine is very lightweight. It can be bought in small vials able to treat upwards of 25 quarts. A small vial weighs around 3 ounces.
- Ease of use: Just throw it in the water, shake, and wait.
- Cost: Cost is all relative, but if you don’t treat water often or carry these as a backup, it’s very cost effective. You’ll spend $7 or less for a vial of 50 tablets.
Cons
- Taste: Iodine makes your water taste terrible. Not undrinkable, just…classically iodine-like. There are tablets that try to reduce the taste, but it’s still there.
- Time: You should wait at least 30 minutes before drinking water that’s been purified with iodine. That’s a lot longer than many filtration or purification systems.
- Ineffective Against Cryptosporidium: This con is a major one. While Iodine works against all other pathogens commonly found in water, it doesn’t kill cryptosporidium. It’s impossible to know if cryptosporidium is in the specific water you’re filtering, which causes many to use the chemical treatment below.
Chlorine Dioxide Water Treatment
Similar to Iodine, Chlorine Dioxide is a more modern chemical treatment for killing pesky pathogens. It often comes in the form of drops, and most commonly can be bought in the two-drop solution by Aquamira.
Pros
Chlorine Dioxide has similar pros to Iodine, namely: weight, cost, ease of use, and shelf-life. It also…
- Kills Cryptosporidium: Unlike Iodine, this one works on cryptosporidium, which means it works against all common pathogens you might encounter.
- Has No Taste: Unlike Iodine, Chlorine Dioxide does not give the water an icky taste. It also doesn’t discolor the water.
Cons
- Time: The cons for this near-perfect water treatment are similar to iodine: it takes 15-20 minutes for it to work. You also have to put drops from Part A and Part B (it’s a two-part solution) in order for it to work. Count the drops carefully.
- Quantity: The other major con is volume, which you’ll have with tabs and drops in general. Most backpackers keep these as a secondary water treatment, and have another filter or purifier. This is because the drops and tabs treat a certain amount of water, and large amounts require lots of drops and time.
Pump Filters
It’s time to dig into more robust physical products. The first is one you’ll see all over the backcountry: pump filters.
A pump filter is typically made of three components:
- The hand-held pump
- The filter
- The tubes
You place the “dirty” tube in the water source, you pull and press the hand-held pump up and down, it brings water through the filter, and the water comes out the “clean” tube or directly from the filter into your water carrier.
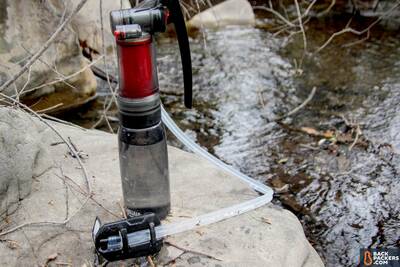
This pump filter has one tube that goes in the water, and a spout on the bottom where it comes out. It also screws onto wide-mouthed bottles.
Depending on the specific model, a pump filter can be a filtration or a purification device. The large majority of pump filters are filtration, as opposed to purification. This is because the majority of pump filters use filters with holes that are too big to stop viruses from getting through. The MSR Guardian Purifier is a standout exception to this.
Pros
- Speed: Pump filters are fast (as long as your arms are strong). If you pump regularly you can filter upwards of 1.5 liters per minute, which is a full Nalgene after a quick water stop.
- Group and Single Use: Pump filters are great for individual use and small groups. You can bring a water carrier bag meant for the group and filter into that, or set up the pump and fill up water bottles or hydration packs in under 10 minutes. They’re also compact enough to serve as a single person’s filtration system.
- Sediment Filtration: One issue with drops and tabs (and other treatments below) is that they don’t get particulates out of the water. The sediment is gross and can have adverse effects on a successful treatment. (The thicker the sediment in the water, the more drops/tabs you need to use). Pump filters usually have a small pre-filter on the dirty tube to get rid of this, and the tiny holes of the filter takes care of the rest.
- Works in Shallow Water: Pump filters have a tube and flotation device that sits on the surface of the water. This means you can filter from very shallow or dried up sources quickly. Many other treatment methods first require you to scoop the water, which is hard to do if the water source is shallow.
Cons
- Tiring: Pump filters require you to push down the pump. Over and over and over again. If this sounds like a nitpicky complaint, it is. To a degree. If you’re filtering tons of water with a pump it can get old fast, especially when other, easier methods are available.
- Clunky: This really depends on the pump itself, but they often have the most parts out of any treatment method on this list. There’s at least the tubes and the central unit, but there’s usually a pre-filter, a carrying case, cleaning tools, and other attachments. They work great when you’re pumping away, but at first they seem clunky and complicated to set up.
Squeeze Filters
Squeeze filters are a fairly new water treatment system to the backpacker scene, but they are overwhelmingly popular due to their ease of use and compact size. These things are tiny.
Pioneered (and dominated) by Sawyer, a squeeze filter consists of a bag, the compact filter unit, and your mouth (or another bag). It works by physically squeezing the dirty water in one bag through the filter and into whatever receptacle works best for you.
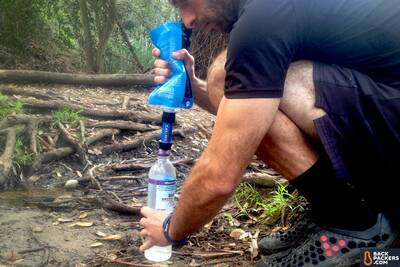
Squeeze filters are simple and satisfying, but the flow rate isn’t the best.
Squeeze filters, at the time of writing, are all filtration based and do not purify water.
Pros
- Size and Weight: The most obvious pros are size and weight. Squeeze filters typically fit in the palm of your hand and are shaped like large markers. This makes them incredibly lightweight and storable anywhere.
- Ease of Use: It’s often a “screw and go” mentality (that’s not dirty, I promise). You fill up the bag with dirty water, screw it onto one end of the filter, and squeeze. That’s it.
- Versatile: Due to the size and ease of use squeeze filters can be easily rigged into gravity filters (see below for a full description of those). They can also be put inline into a hydration bladder system.
- Immediacy: The water comes out immediately, so it’s great if you want to drink right then. Many people fill up the dirty bag, screw the filter on, and then carry on with their hike. Whenever you need a sip you can drink, rather than filtering all the water at once and then moving on.
Cons
- Clogging: Due to the squeeze filters’ size, they do get clogged more often than other filters. This requires backflushing (or a highly reduced filter rate), which can be annoying in the field.
- Single Use: This could be a pro or a con depending on your needs, but I put it here because it’s a limiting factor. While squeeze filters can work for larger groups, they are not ideal. Perfect for solo hikers or those who have individual water filter systems.
Gravity Filters
Gravity filters are new to the scene and have become increasingly popular, especially for backcountry trips with more than two people. The premise is to harness gravity to do all the “work” of filtering — the same “work” that’s all about the brawn with a pump filter.
You typically have two large bladders (two liters or four liters), multiple hoses, the filter unit, a carrying case, backflushing tools, and small attachments for water bottles or inline attachments. You fill one bladder with dirty water and hang it on a nearby tree or tall rock. You attach the dirty hose to the filter, then attach the clean hose to the filter, then attach the clean bladder to the hose.
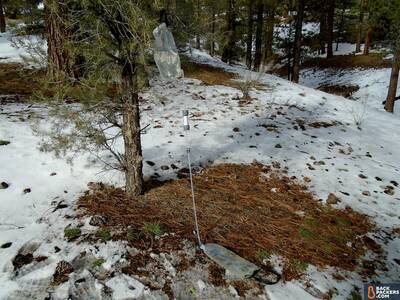
Gravity at its finest wit the Platypus GravityWorks water filter.
You sit back as gravity moves the dirty water through the filter, treating your water while you relax. Sounds nice, right?
Gravity filters, for the most part, provide filtration, not purification.
Pros
- Hands-Free: The gravity filter requires relatively nothing once it’s set up. Just dump more dirty water into the top (or scoop more with the dirty bag). This works especially well if you have a large water carrier to put the water into. If not, you will have to swap out water bottles and bladders because the flow just keeps going.
- Very Fast: The real pro of a gravity filter is speed. You can filter almost 2 liters of water per minute. The stuff comes out lightning fast, and backflushing is much easier than other units, so you can consistently get that speed.
- Group Oriented: If you consistently backpack with more than two people a gravity filter is worth it; just set it up at camp and anyone can filter water when they need to. It’s overkill for one person.
- Pure Joy: Any gearhead who uses a gravity filter will revel in its simple ingenuity. Gravity literally pulls the water through the filter for you — it’s like rocket science compared to iodine tablets.
Cons
- Setup Time: With two bladders, two hoses, and other parts (clamps, lids, etc.) it’s not the speediest filter to set up. Typically people get to camp and set it up, then filter for the evening and morning. It’s cumbersome when used during a hike, and therefore better suited to people who stay in campsites for hours, rather than hike all day.
- Many Pieces: Coupled with the setup time is the number of pieces. Like pump filters, this can be overwhelming at first. Though, I will say, most gravity filter’s pieces tend to make much more sense out of the box than pump filters do.
- Expensive: Gravity has a cost. The quality of the filter is usually high, and the extra bladders and hoses add up. This is not an inexpensive option.
Straw Filters
This is a baby category, one that safari-happy tourists in underdeveloped nations tend to use. It actually utilizes a very similar filter to the squeeze category, but instead of attaching a straw or bladder to the filter and squeezing, the filter is the straw.
You bend down to the water’s edge, stick the straw in, and suck. There’s your filtered water.
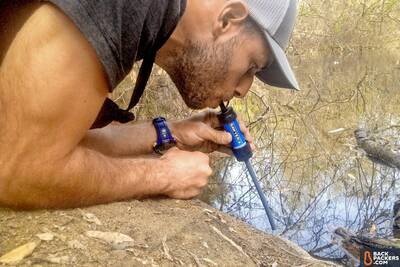
Cool looking, maybe not the most convenient way to filter water.
Straw filters are often filtration devices, rather than purification, except for some high-end models.
Pros
- Immediate: You stick the straw in and drink. That’s about as quick as you can filter water.
- Small and Lightweight: The filter is the straw, so these typically weigh under 3 ounces and fit just about anywhere.
Cons
- No Storage: The main issue with these straw filters is that you can’t filter more water than what you can gulp down right there. It’s great if you are traveling along a river your whole trip and can drink any time you want, but in most environments you want to fill up at least a small water bottle for later.
- Awkward: I know hunkering down to the water’s edge and sipping seems cool, but doing that every time you want a drink will get old fast.
Water Bottle Filters
Perhaps the newest rage in the filtration and purification world, water bottle filters are gaining traction among international travelers and more casual users. The filter is fastened to the inside of the bottle; every time you take a drink it is filtered on the spot.
This is similar to the straw filter and the squeeze filter, but in a water bottle form factor.
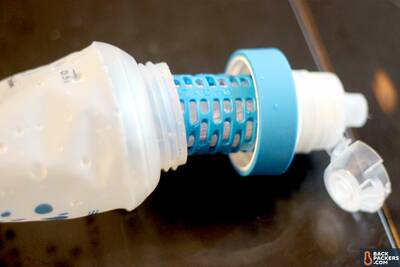
A water bottle filter with a soft container. Excellent flow rate, compact package.
Water bottle filters are a mix of filtration and purification, so you’ll want to know which kind you’re getting.
Pros
- Ease of Use: The main pro for water bottle filters is ease of use. You probably already carry a water bottle with you; if it’s a water bottle filter, you know you’ll have clean drinking water wherever you are. Just fill it up and drink.
Cons
- Limited Amount of Water: Most other water treatments in this list can filter any amount of water given enough time. A water bottle has a limited amount of water in it, and you can only filter the water as you’re drinking it. You could carry a backup bladder or bottle of dirty water to be transferred, but that’s not very time efficient.
Ultraviolet Purification
The final water treatment method in this list is a major one: UV purification. This works by blasting ultraviolet light into the questionable water for a specific amount of time, which neutralizes the pathogens in it.
One big note about UV purification: It does not kill the pathogens. Instead, it scrambles them so they cannot reproduce, thereby causing them to be harmless to your body. This is true unless the water sits for hours, in which case they can “come alive” again and wreak havoc. Don’t sterilize large batches of water you don’t plan to drink until later on.
UV light is purification, as opposed to just filtration.
Pros
- Quick: A typical UV unit takes about 60 seconds to purify a small water bottle. It’s not the fastest method on this list, but it’s pretty darn quick.
- Ease of Use: You just stick the light in the water, swirl it around (following instructions), and you’re all set. This is arguably the easiest method on the list, but it depends on the individual unit you have. Some are more complicated than others.
- Covers All Bases: As you can see, not many treatment types on this list are purifiers. Ultraviolet devices purify your water, making them great for international travel or virus-prone water.
Cons
- Batteries/Battery Life: This is a unique concern to UV purifiers. They require batteries and are susceptible to dead batteries or low charge. It requires foresight to make sure your batteries are charged.
- Malfunction: Similar to the battery issue, sometimes you get a faulty unit, or it stops working due to electronic reasons that you can’t asses or fix. Most of the other filters have mechanical parts that can be dealt with in the backcountry. If your UV purifier doesn’t work, it will be hard to fix out there. (This means it’s worth the extra cost get a good one from a legitimate brand).
- Sediment: UV purifiers don’t filter anything, so the water you scoop is the water you’re treating. If that water has lots of sediment in it, it will taste worse and take longer to treat.
What is Micron Size for Water Filters?
As you can see from the above list, “filters” are the most proliferous water treatment method, and they’re often the most popular among backpackers, hikers, and campers.
With most filters you’ll see a number come up: micron size. This is how large the holes are in your filter, and therefore what pathogens will be stopped. Bacteria and protozoa are, at a minimum, .2 microns in size. You’ll see many filters this number, or .1 microns, which is even smaller.
Viruses have a size of around .02 microns, which is significantly smaller. Very few filters can filter viruses, which is why UV light, chemical treatment, and boiling water are still the most effective methods of treatment for viruses.
What are Filter Media for Water Filters?
The filter media is the type of filter in the unit itself. This can determine water taste, filtration rate, cost, and a number of other factors. For most users the difference is not consequential, but here are the most common filter medias:
- Hollow Fiber
- Ceramic
- Fiberglass
- Silica Depth
While you could choose a filter based on its media, I don’t think it’s necessary to get too specific.
Extra Water Filter and Purifier Features
There’s a ton of information above about water filters, purifiers, treatment systems, and use in the backcountry. There are a few things I haven’t covered yet, so I’ll go over them here.
Prefilter
Mentioned above, a prefilter is a device that helps to strain out particulate or sediment in water. It’s highly recommended if you’re pulling from silty, gross, or very shallow water. Particulate tends to clog filters, disrupt UV and chemical purification, and generally be a bummer.
Nobody wants little clumps of who knows what in their drinking water.
A prefilter gets rid of this. Many pump filters have one built in, which is handy. However, no other method has a built in solution.
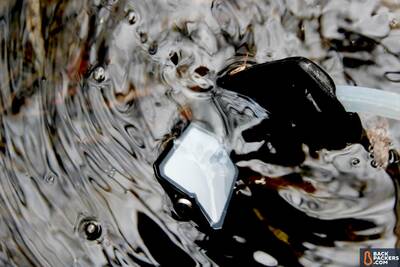
The white screen is an automatic prefilter on this pump filter. A bandana will do, but it’s more labor intensive.
The first rule of thumb is to pull from the “cleanest” part of the water source. Grab water from the top of the pond without disturbing the water, or dip frequently until you get a clear batch.
You can usually buy a separate pre-filter unit for your specific filter, but it’s a drag to buy more for something that already works. I use a t-shirt or bandana to prefilter in necessary situations — I know it sounds silly but it works.
If you know your water sources will be full of crap, bring an appropriate prefilter.
Activated Carbon
Another element in some filters, activated carbon helps to get rid of unpleasant smell and taste. Found in higher-end filters, this is excellent if you are dainty about your water.
Number of Uses
The final element here is a big one. Number of uses applies to every water treatment type listed above and varies for each one, especially per brand. This makes it hard to say definitively that one type of filter has “more uses” than another.
In general, know the number of uses you’re getting out of your filter options.
- Chemical treatments have a specific number of gallons stated on their boxes. Tabs or drops last exactly what they say they will (and don’t skimp!)
- Filters also have a stated number of uses. These can vary wildly — from 100,000 gallons (a lifetime, basically) to 100 gallons. It all depends on the filter media and the manufacturer. Most filters can be replaced, either by buying new filter units (like on a gravity filter) or new cartridges (like on a pump filter). A few will require you to buy the filter again.
- UV purification will last forever, ostensibly. At least until the thing breaks, because it’s an electronic and will probably break at some point. Your uses are limited to battery life here.
Backpacker Types
So, with the entirety of water treatment systems above, which is best for you? I’ll go over water treatment in regards to our Backpacker Types below.
Note that the chemical treatment method is one I always recommend as a backup. It’s an excellent, foolproof backup for emergency situations in the backcountry. A vial of tabs or drops weighs under 3 ounces, can be used in a pinch, and will filter all pathogens.
However, due to its long wait times, I also recommend investing in a quicker water treatment system that works for you. These are discussed below.
Lastly, water treatment systems cost varying amounts. We found that the more you want to spend, the more people the system can treat (to a degree). Our recommendations reflect this.
Wilderness Backpacker
The Wilderness Backpacker needs a treatment system that is lightweight, easy to use, and can treat for small groups of people. In the U.S. viruses are not common in the backcountry, so a filter is all you should really need (especially if you have a chemical backup for purification).
For the Wilderness Backpacker we recommend squeeze filtration for its versatility in solo or two-person groups, a pump filter for its durability and small groups, and a gravity filter for ease of use and larger groups.
Ultralight Backpacker
The Ultralight Backpackers’ main concern is weight, and filters have a huge range when it comes to both size and weight. There are excellent filters that weigh almost nothing, so it’s easy to find a filter that will work with your ultralight setup. If you’re hardcore you can forego a filter and just use chemical treatment; this is always lightweight and works. However, it takes a while to filter water, which is also against the ultralight ethos (fast and light).
For Ultralight Backpackers we recommend minimal squeeze filters or UV purification. Both are incredibly lightweight, simple to use, and quick.
Car Camper
Car Campers in the U.S. don’t often need a water filter. Most state and federal run sites have potable water on site, which makes treatment relatively unnecessary. However, you may want to drink from the local stream. You can do this with chemical treatment, but filters are great for the group. Weight is not a concern, whereas high volume of water is.
We recommend a fast pump filter or a gravity filter for a Car Camper.
Day Hiker and Urban Hiker
Day Hikers in the U.S. probably don’t think about bringing water filters with them; but hiking in undeveloped nations, or in emergency situations, they are critical. This is also true for Urban Hikers. In both cases you need something easily portable, easy to use, and capable of purification.
We recommend water bottle filters, UV purification, or a very high-end pump filter for both Day Hikers and Urban Hikers.
Affiliate Policy: We support the hours that go into our reviews, testing, and guides through affiliate commissions on purchases made through links in this article.
Does it make sense to use both methods, for example put dirty water in a bottle, put Chlorine Dioxide tabs to purify it and then after half an hour drink it with a squeeze filter?
Does it make sense, would it purify the water and also get rid of other particles from the water?
It’s unnecessary to do both methods if you have a proper squeeze filter. The Sawyer Squeeze, for instance, is rated to 0.1-micron absolute filtration, meaning that it will remove 99.99999% of all bacteria and protozoa, and it also removes 100% of microplastics. That’s virtually as perfect as a filter or chemical solution can get.
Now, you can add in the Chlorine Dioxide as an extra preventative step, but it really isn’t going to result in any better purification because the Sawyer Squeeze is already fully capable of water purification on its own.
It’s interesting to learn about different types of water filtration systems and how they treat contaminated water. My cousins and I are going camping in two weeks, and we’re interested in buying a water filtration system to help us survive in the wilderness. Thank you for the information on UV purification and how it neutralizes the bacteria in water.
I like that you said that having proper water filtration could help implement healthy safe water consumption. Yesterday, my best friend told me that he and his wife were hoping to find a house water filtration that could provide health-safe water in their home to prevent having health problems. He asked if I had any idea what would be the best option to do. Thanks to this informative water consumption guide article for effective planning. I’ll tell him it will be much better if he consults a house water filtration service as they can help provide details about home water treatments.
Water purity is not something to be taken lightly, and I appreciate this article’s focus on the importance of water purification, especially when it comes to safeguarding our health during our travels. Thank you for shedding light on this important topic. It serves as a valuable reminder to prioritize water purity and safety during our travels.
I’ve personally been using a minimal squeeze filter for my backpacking trips, and it’s been a game-changer. The convenience and speed of the filtration process make it an ideal choice for those who value a fast and light approach. It’s reassuring to know that there are options like UV purification as well, offering simplicity and efficiency.